Pages

Friday, February 25, 2011

Presto Pea Pesto


I made this on Tuesday, but it was another crazy week. So today I am finally posting it. I made a Pea Pesto. It is a lot tamer tasting than a normal pesto. Due to that I liked it better. We served it with noodles and chicken with parmesan cheese on top.
Presto the History of Pesto
The city of Genoa, Italy is where the first recipe for pesto came from. They adapted a cheese spread called moretum, which was made in Ancient Greece. Genoa was, and still is, known for its basil, so obviously they added basil to the sauce. They also added crushed garlic, pine nuts and olive oil. In French Provence, the dish evolved into the modern pesto, a combination of basil, parsley, crushed garlic, and grated cheese.

Lets get cookin’
2 c. peas
½ c. grated parmesan
½  c. pine nuts
2 medium cloves of garlic
¼ c. extra-virgin olive oil
2 tbsp of water
¼ tsp of salt


Blanch the peas in boiling water for 30 seconds than shock them in cold water
Combine the peas, Parmesan, pine nuts, garlic, olive oil, water and salt in a blender or food processor. Blend until the ingredients are combined and form a thick sauce.
Toss together with noodles and chicken. You can also serve it cold in the summer.


Blanch the peas in boiling water for 30 seconds than shock them in cold water


Combine the peas, Parmesan, pine nuts, garlic, olive oil, water and salt in a blender or food processor. Blend until the ingredients are combined and form a thick sauce.


Toss together with noodles and chicken. You can also serve it cold in the summer.

êêCriticsêê
Me     êêêêê           Momêêêêê                        Dadêêêêê
Would I make it again…
                YES! I  absolutely love it. 
What would I do differently...
                  I would add some more garlic to give it a little more flavor.


Tuesday, February 22, 2011

Tips and Bits: Skewers

Today I started a tips section called Tips and Bits Tuesdays. Here I will give hints about how to do stuff, make things eaiser and organization tips. The one now is about skewers.


Soak  your wooden skewers in water for 30 minutes before using
 them so they won't burn during cooking.
 
 If you prefer metal skewers, which have a long life, use
 square or twisted types, which will hold the food better
 than round ones. 
 
 To keep food from slipping off during cooking and turning,
 use two parallel skewers rather than a single skewer. 
 If you're using a wooden skewer, as you thread the food
 move the pieces close together, with no space showing.
 If the skewer is metal, you can leave small spaces between
 the pieces. 

 When using foods with different cooking times (such as shrimp
 and beef), don't combine them on the same skewer. Instead,
 make skewers of just shrimp or just beef, start cooking the
 beef first, and then combine them on a serving platter.

Sunday, February 20, 2011

Buttermilk Pancakes


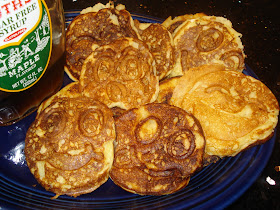
There is no better way to start a long weekend, then with some homemade buttermilk pancakes. On top of that, for Christmas my parents got me a smile face pancake skillet. Together they make a deadly duo, even at 7:00 in the morning.


History Behind the Tart
Originally, buttermilk was the left over fluids after churning the butter. It gets the tart taste from the lactic acid in the milk.  In 1902 they started to culture buttermilk. On these labels it said Artificial Buttermilk and on the labels of the traditional buttermilk it read Original Buttermilk.


Lets get Cookin’

Ingredients

2 c. flour
2 tsp baking powder
1 tsp baking soda
½ tsp salt
3 tbsp sugar
2 large eggs lightly beaten
3 c. buttermilk
4 tbsp butter, melted plus ½ tsp for griddle


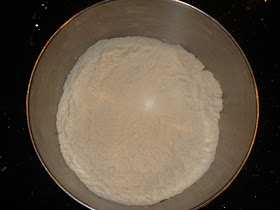
1.) Whisk together flour, baking powder, baking soda, salt, and sugar in a medium bowl.


2) Lightly beat egg.


3.) Add eggs, buttermilk, and 4 tablespoons butter

 4.) whisk to combine. Batter should have small to medium lumps.

5.) Butter griddel. 


6.) cook and serve fresh out  of the pan:-)

êêReviewêê
Me: êêêê Paul: êêêê Mom:êêêê Dad: êêêêê

Would I make it again…
Yes

What would I do different…
I would start at a lower temperature so the middle gets cooked all the way.


To get this and many other great recipies go to http://www.marthastewart.com/recipe/

Thursday, February 17, 2011

Valentines Day Menu


First off, sorry, it’s been a while. This week was crazy with homework and studying for tests. And I know that Valentine’s Day was a few days ago, but it’s better than nothing :-) Next week I will be in a set schedule. I am super excited for it because I won’t only be adding recipes. You can expect to find things such as; kitchen organization tips, cooking tips, nutrition ideas, food shows and restaurant reviews, apron ideas and just my thoughts on foods. If you have any suggestions please comment on the post.


My Dad, with the help of Paul and myself made an amazing dinner for Valentines, before my Mom got home. I wanted to give you a breakdown of the meal.
For the main meal we had Chicken Primavera. It was fabulous!! You can expect to see the recipe eventually when we make it again.
 Our drink was Chocolate milk. YUM I know. Chocolate milk is a big treat in our house. We get it about 3 times a year on special occasions. For every other day in the year we drink skim milk.
For our vegetable we had asparagus drizzled with a sauce I made. The sauce was ok. I personally don’t love asparagus, I’ll eat it, but I would eat it more with this sauce. The recipe was steam asparaguses as you normally would. Than on medium heat in a sauce pan mix I part milk, 1 part miracle whip and 1 part cheese. Granted I made it closer to 2 ½ parts cheese. All in all every one gave it a 3 out of 5 stars.


 We also had garlic baguette or French bread.


For dessert, Paul made some strawberries dipped in chocolate and we split the red velvet cakes, as seen above.


Sunday, February 13, 2011

Mini Sweetheart Red Velvet Cakes

HAPPY VALeNTINeS DAY!!!

Zoe, Me and Rachael

Today I had two of my best friends Zoe and Rachael over to help me make some amazing tasting sweetheart red velvet cakes! The flavor was so rich and wonderful. It was my first time I have ever had Red Velvet cake and I seriously don’t know if I’ll ever be able to eat any other flavor. We had a great time baking and personalizing (and I DO mean personalizing) our mini cakes. We definitely had some ups and downs. Between Zoe “heart attacking” me, an egg mishap and teaching Rachael how to pipe frosting, I’d say it was one of my favorite baking experiences ever! 
Afterwards we had a major sugar rush…but that’s ok, what can you expect from 3 teenage girls :-)

Hearting the history
No one knows exactly how the Red Velvet Cake recipe got out to the public. There is one urban legend however. The story started in the 1920’s. It was also about the time the recipe began to circulate. The cake started in New York at the Waldorf-Astoria hotels restaurant, and as the story goes a lady was visiting New York. She ate at the Waldorf-Astoria and had the cake for the first time. When she got home she wrote to the chief asking for the recipe. They sent her the recipe along with a bill for $350. She was so mad she made copies of the recipe and distributed them everywhere she went. This is why red velvet cake will sometimes be referred to Waldorf-Astoria’s $200 cake. This story has never been confirmed.
Sweethearts have been around since the early 1900’s created by the Necco Company. They came in larger sizes and various shapes compared to today’s small hearts. On them, things were written such as “Please send a lock of your hair by return mail,” or “How long shall I have to wait? Pray be considerate.” Over the years the sayings have become shorter, as the candies have gotten smaller. In 1990, the Necco Company decided to add a new saying each year. Millions of kids and adults send in ideas for what the new saying should be. The sayings may be constantly changing but the recipe is identical to the original one!

Lets get cookin'

2 1/2 cups flour
1/2 cup unsweetened cocoa powder
1 teaspoon baking soda
1/2 teaspoon salt
1 cup (2 sticks) butter, softened
2 cups sugar
4 eggs
1 cup sour cream
1/2 cup milk
1 bottle (1 ounce) red food coloring
2 teaspoons vanilla extract
2 cans of vanilla frosting
Assorted food coloring


1.)     Preheat oven to 350°F

2.)    Mix flour, cocoa powder, baking soda and salt in medium bowl. Set aside.

3.)    Beat butter and sugar in large bowl with electric mixer on medium speed 5 minutes or until light and fluffy.


4.)    Beat in eggs, one at a time


Egg mishap :-)

Thursday, February 10, 2011

Orange Julius

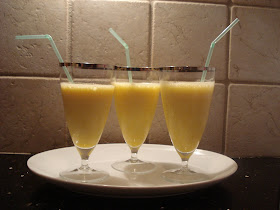
These Orange Julius’s tasted exactly like the real deal, and it only took 5 minutes!

Juicing out the History

For the past 85 years the Orange Julius has been rocking the beverage world. It was founded by Julius Freed and Bill Hamlin, all the way back in 1926. The first Orange Julius store was opened in California. Originally, the store only sold orange juice, but Bill Hamlin started to blend the juice with other ingredients and the idea was an instant success. By 1929, the company expanded to 100 stores.  At Canada’s World fair in the 1960s the frothy and refreshing drink was introduced to the world. Hong Kong opened its first Orange Julius in the 1980s.  In the late 1980s Dairy Queen bought the company and added their drink to its menu. Today you can stop at your local Dairy Queen or one of the 200 Orange Julius’s stores to get the drink. Once there, you can choose from one of the many flavors. Some of the flavors are strawberry, berry, peach and of course orange.  
Lets Get Cookin' 
Ingredients
6-ounce can of orange juice concentrate
2/3 c. milk
2/3 c. water
1 tsp vanilla
8 ice cubes

2 tsp sugar


1.)    Put all ingredients in a blender.


2.)    Blend until thick.


3.)    Pour into 3 glasses and enjoy.

Yields 3   2/3 cup per serving


êCritic’s Ratings ê          

Me:  êêêê  Mom:   êêêêê Dad: êêêêê Paul: êêêê     


Would I make it again....
Yes

Would I change any thing....
Make a double batch:-) and I would use orange slices as garnish.

Dont feel like making them....
Go to your local Dariy Queen.


Thanks to The Joy of Snacking by Nancy Cooper and http://www.ehow.com/ for the history info!